15+ ARDUINO PROJECTS IDEAS WITH DIY INSTRUCTIONS
Welcome to my collection of Arduino Projects. Even if you are just getting started with Arduino, you don’t have to worry about that. Each of the following DIY Arduino projects is covered with detailed step by step tutorial on how to do it yourself and includes circuit schematics, source codes and videos.
This collection of Arduino Projects features:
- Wireless control
- Automation
- Motors control
- Robotics
- LEDs
- and more.
Along with my DIY Arduino projects here you can also find project ideas backed up by my detailed Arduino tutorials for various sensors and modules. Using the comments section below, you can also suggest your ideas, as well as discuss anything related to these Arduino projects.
I will continuously update this article with all new stuff that I make.
Arduino Projects with detailed step by step guide
Arduino Radar (Sonar)
This is one of my most popular projects and it’s really fun to build. The radar can detect objects in front of it and map them on PC screen using the Processing IDE.

For this project you just need two components along with an Arduino board, and that’s an ultrasonic sensor and small servo motor. The range of the radar can be adjusted to up to 4 meters with 180 degrees rotation.
Difficulty: Intermediate
Range Measurer and Digital Spirit Level
Here’s another project utilizing the HC-SR04 ultrasonic sensor. This time we will use it to make an distance meter which can measure distances up to 4 meters, as well as, measure square area.
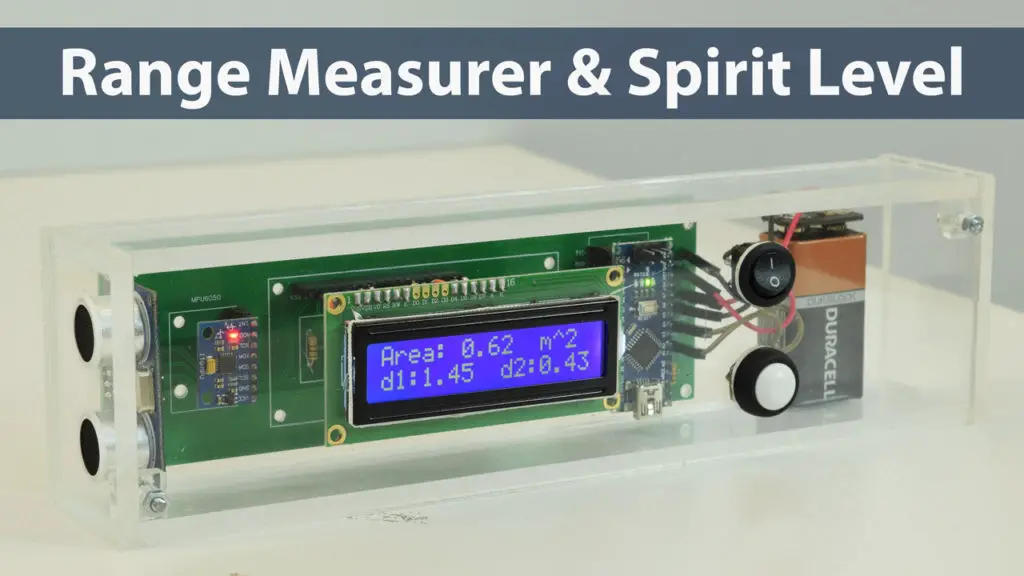
The project also includes and accelerometer which is used for the digital spirit level function or for measuring angle. The results are displayed on 16×2 LCD and all components are attached on a custom design PCB.
Difficulty: Advanced
Arduino Color Sorter
Sorting out objects or products by their color has an important real world application. These types of machines are often used for sorting fruits, seeds, plastics etc. The working concept of these machines is rather simple. All you need is a color detecting sensor and of course a system that feeds the object to the sensor and then sort it out.
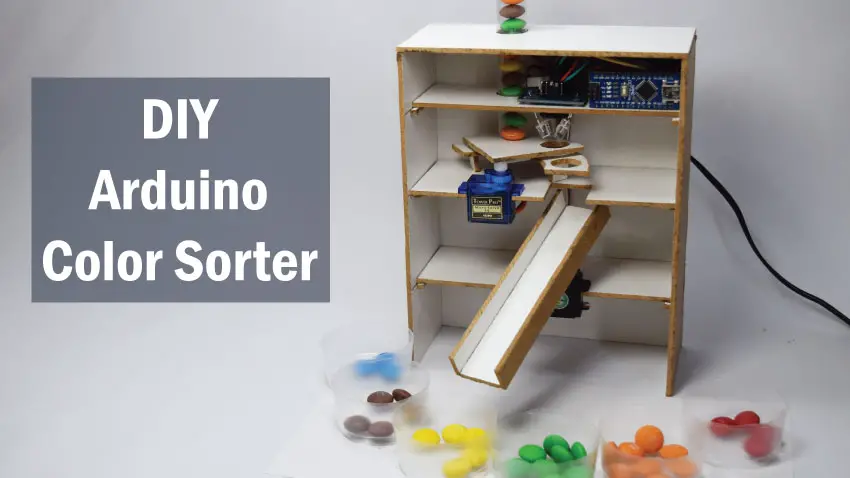
In this project we will learn how to use a color detecting sensor along with the Arduino. We are going to be sorting out colored skittles but you can use the same sensor and method for sorting out anything else.
Difficulty: Intermediate
Arduino Robot Car
The combination of DC motors and Arduino is always fun, and so is this project. Here we will build our own robot car from scratch. The car will be powered with Li-ion batteries and two 12V DC motors, and controlled using the L298N driver and an analog Joystick.
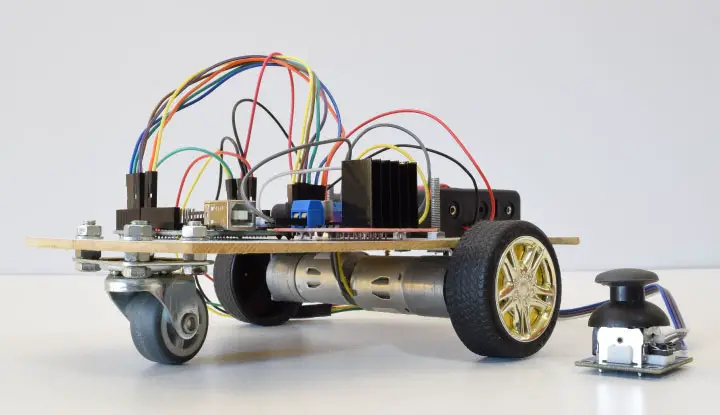
Through this project we will also learn how H-Bridge and PWM motor control work.
Difficulty: Intermediate
Arduino Robot Car Wireless Control
This Arduino project is an extension to the previous one, and here we will learn how to wirelessly control the Arduino robot car.
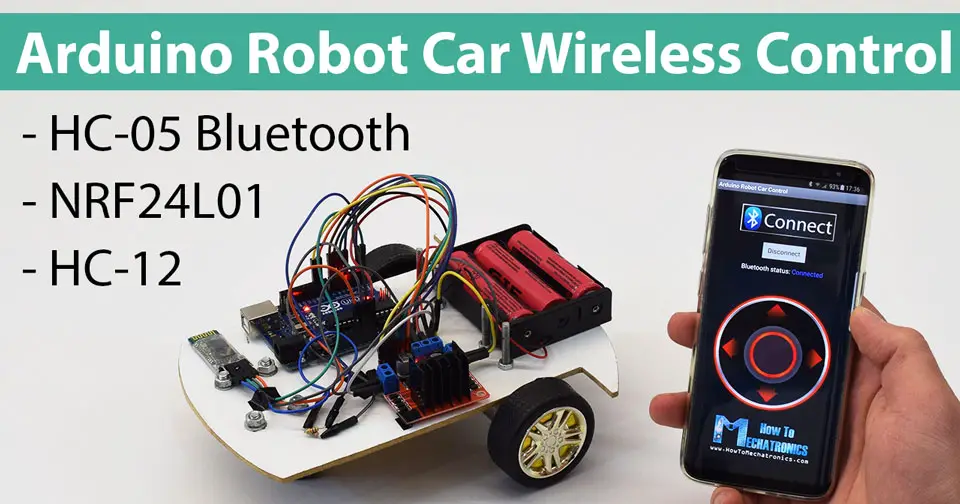
You can choose one of the three different methods of wireless control explained in this project, or that’s the HC-05 Blueooth module, the NRF24L01 transceiver module and the HC-12 long range wireless module. Additionally you can learn how to make your own Android app for controlling the Arduino robot car.
Difficulty: Intermediate
RFID Access Control System
RFID technology has wide range of applications and access control is one of them. We often encounter this in hotels for accessing our room or at work for checking in or accessing restricted areas.
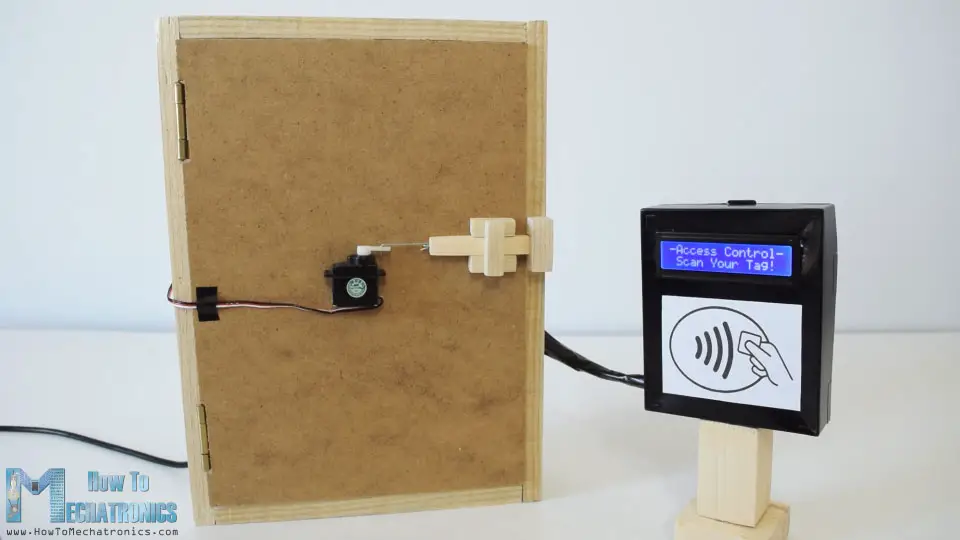
In this project we will learn how to use the Arduino to make an RFID controlled door lock. The system consists of an MFRC522 RFID reader and RFID tags/ cards that are based on the MIFARE protocol.
Difficulty: Intermediate
Arduino Game Project
This game project is based on the popular Flappy Bird game for smartphones. Using the touch screen we control the bird while trying to avoid the pillars.
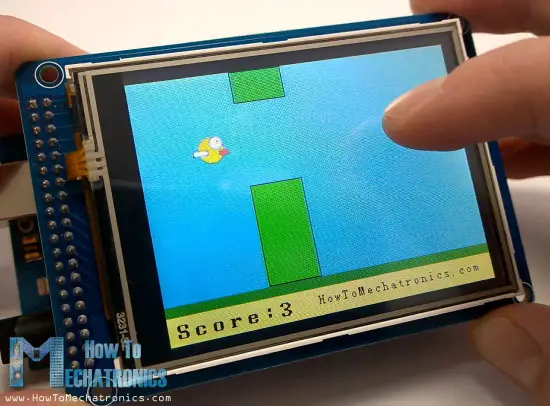
For this project we need a 3.2 inches TFT Touch screen, an TFT Mega shield adapter and an Arduino Mega board. The code is a bit longer but everything is explained in details.
Difficulty: Advanced
Arduino LED Matrix Scrolling Text
In this project we will control LED Matrices using the MAX7219 driver. This driver can control up to 64 individual LEDs while using only three wires. Also we can connect up to 8 drivers in series and still using the same wires.
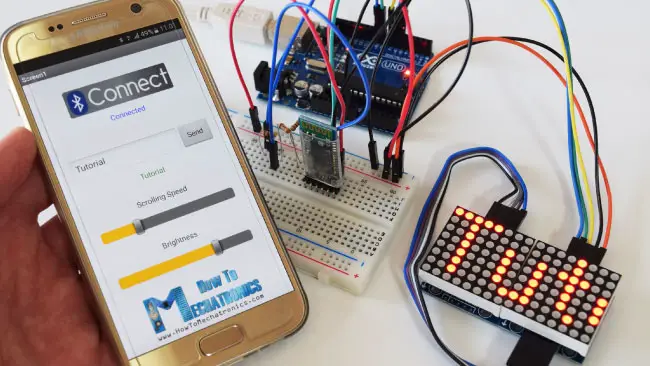
To make this project more interesting I also added an example where you can update the text on the LED matrixes through your smartphone using a custom-made Android app.
Difficulty: Advanced
Arduino Camera Slider with Pan and Tilt Mechanism
Camera slider are great for capturing cinematic shots, and having pan and tilt system on top of it even further increase the possibility to capture better shots. In this project I will show you how you can build your own one, which costs way less then one found in the stores and still you can get great and super-smooth shots.
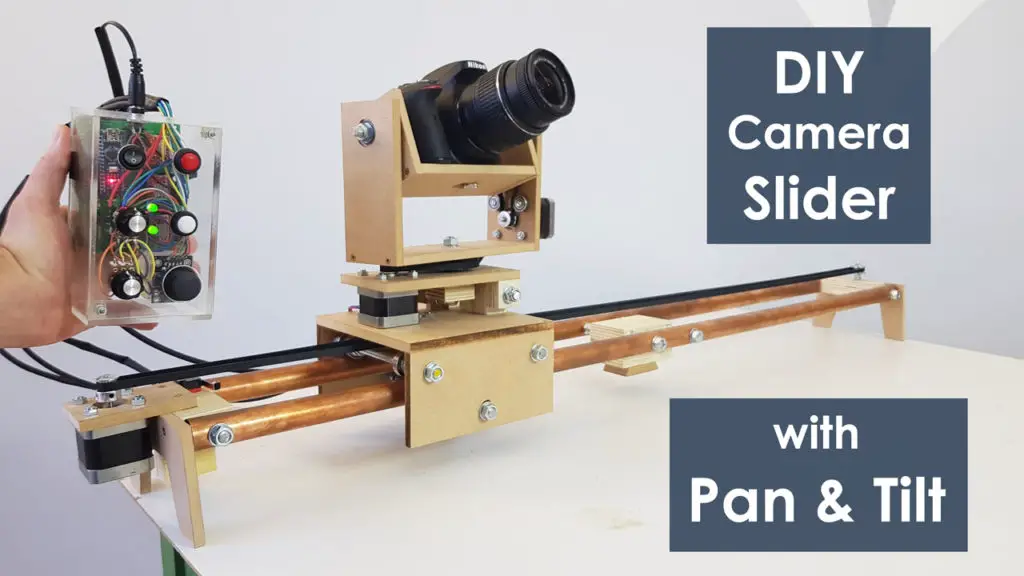
The slider has three NEMA 17 stepper motors controlled via the A4988 stepper drivers and the Arduino Nano board. Using a joystick we can control the pan and tilt movements and using a potentiometer we can control the sliding movement. With this DIY camera slider we can use the Set button to set two different IN and OUT points, so the camera can automatically move from one to the other point. Personally, considering all my Arduino projects so far, I found this to be the most practical for me.
Difficulty: Advanced
Arduino Alarm System
If you ever thought of making your own security system then this project is a great starting point. Here we will utilize an ultrasonic sensor for detecting movement.
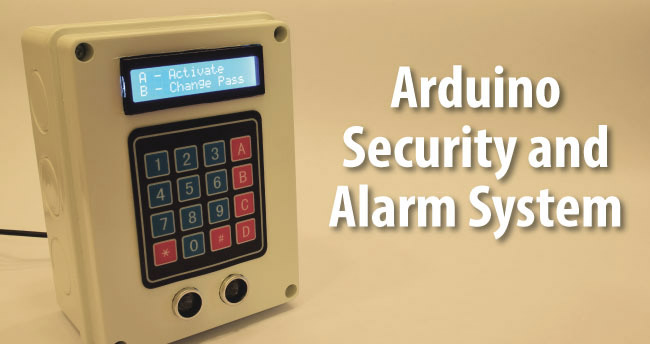
If a human or object passes in front of the sensor, the alarm will be activated. For deactivating the alarm you will have to enter a password using a keypad.
Difficulty: Intermediate
Arduino Music Player and Alarm Clock with Touch Screen
In this project we will learn how to build our own music player. It features a touch screen, MP3 player, a temperature sensor and an alarm clock.
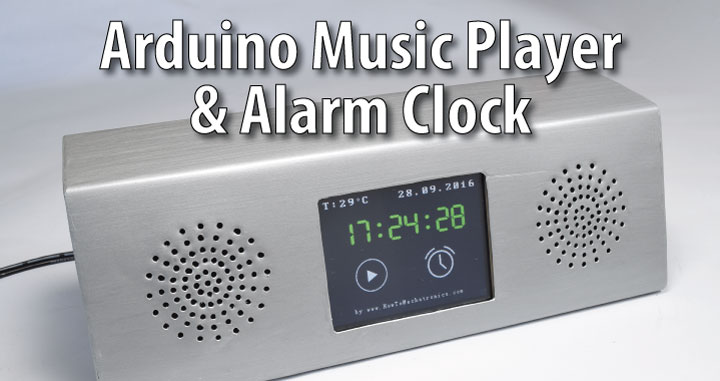
The code behind this project is a bit more complex with around 550 lines but everything is explained in details with comments for each lines. There is also a detailed video explanation for it.
Difficulty: Advanced
DIY Vending Machine
If you are interested in building something more complex with Arduino then this project is the one for you. Although complex, you could easily recreate it as there is a detailed step by step explanation on how everything works, including circuit schematics and source codes.
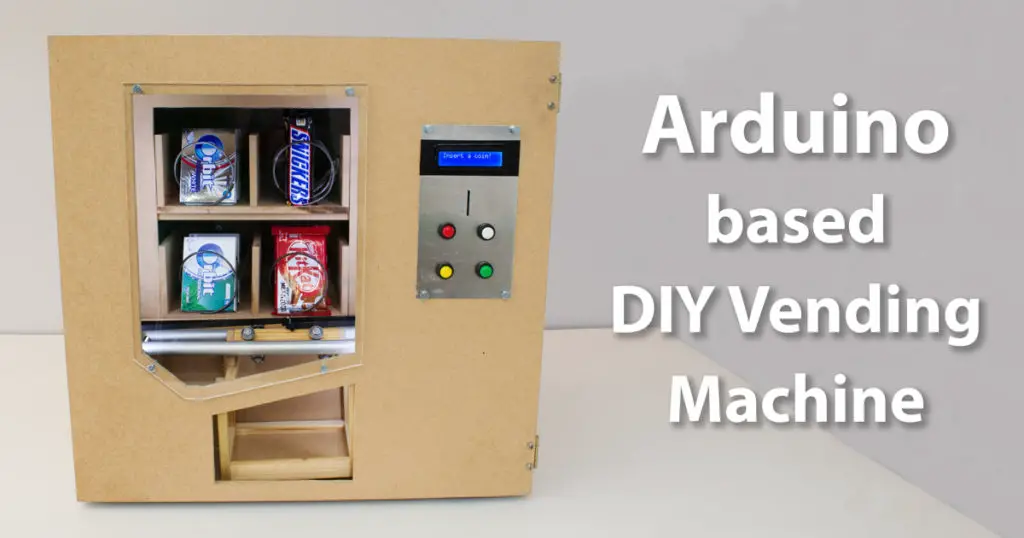
The structure of the machine is made out of MDF. For discharging the items I used continuous rotation servo motors, while for the carrier system I used two NEMA17 stepper motors. For detecting the coins the machine uses an infrared proximity sensor.
Difficulty: Advanced
Arduino Based Interactive LED Coffee Table
At first glance this table looks like a normal coffee table but once you turn on the power on it gets to a whole new level. The table has 45 sections which can glow in any color we want, plus it reacts on objects placed on top of it.
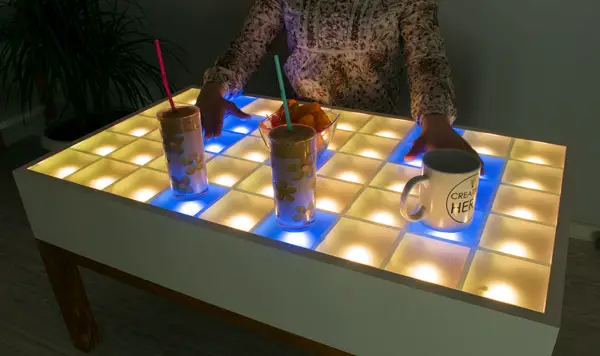
The heart of the table is an Arduino which controls the 45 WS2812B Addressable LEDs and the objects on top of the table are detected using infrared proximity sensors. What’s even cooler it has built-in Bluetooth module which enables interaction with a smartphone for selecting the LEDs colors.
Difficulty: Advanced
Ideas for Arduino Projects
The following section of this article contains Arduino project ideas based on my detailed tutorials on various sensors and modules, as well as your suggestions from the comments section below.
For each project idea I will point out the required components as well as the particular tutorial for each of them.
Arduino Wireless Weather Station
This Arduino project idea is rather practical because it features indoor and outdoor temperature and humidity measurement. It is based on the DHT11/ DHT22 sensor, the NRF24L01 transceiver module for the wireless communication and the DS3231 RTC. For the display we can either use 16×2 character LCD or a 3.2 inches TFT touch screen.

The outdoor unit can be powered with batteries and the indoor unit with an AC adapter. The outdoor unit measures the temperature and the humidity and sends the values to the main indoor unit. Here these values are printed on the LCD along with the data and time values from the DS3231 real time clock module. Additionally, we can use SD Card module for storing the data onto Micro SD card.
Difficulty: Intermediate
Android Smartphone Controlled Power Outlet Using Arduino
Controlling your home power outlets via a smartphone is the first step in home automation. You can easily make your own Arduino controlled power outlets utilizing the knowledge you can get from my Arduino tutorials.
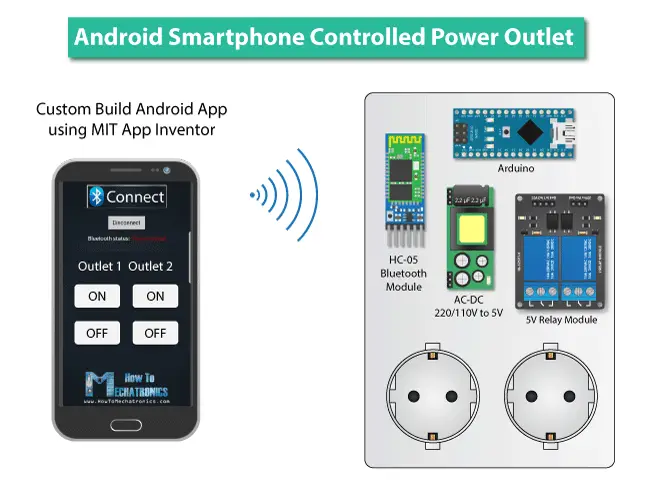
For this project you just need two components along with the Arduino board. An HC-05 Bluetooth module and a 5V Relay module for which I already have detailed tutorials. For powering the Arduino and the relay you can use 220/ 110V AC to 5V DC converter.
Using your smartphone you can connect and control your power outlet via Bluetooth. You can either use some already made apps for controlling Arduino from the Play Store or create your own custom made app. In this way we can also control the power outlets through voice control commands.
Difficulty: Advanced
Home Automation using Arduino
Home automation is one of the most popular Arduino projects nowadays. The goal of this project is to remotely control anything in your house like lights, appliances, temperature, security devices and so on, with a single device or your smartphone.
In order to make such a project we need decent amount of knowledge in Arduino. The following home automation concept that I suggest is based on my detailed Arduino tutorials for various sensors and modules.
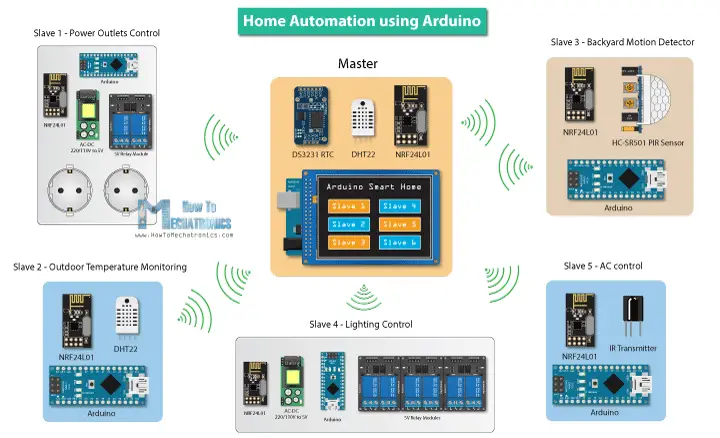
So the idea here is to have a master unit which includes a touch display, and several slave units which will execute commands coming from the master. As for the wireless communication we can use the NRF24L01 radio frequency modules, and each slave unit can have various functions like, temperature monitoring, power outlet control, lights control, security alarm and so on.
Of course, there are endless possibilities and combinations for building a home automation system using the Arduino board. You can always change and add more devices. You can also make a Bluetooth communication so you can control all of this using your smartphone etc.
Difficulty: Advanced
Arduino Robot Arm
When it comes to automated manufacturing, robotic arms play big role with so many applications. They are often used for welding, assembling, packing, painting, pick and place tasks and much more.
Building an Arduino controlled robot arm can be both easy and difficult. It all depends on the control complexity and the results that we want to get. This project suggestion will keep things simple.
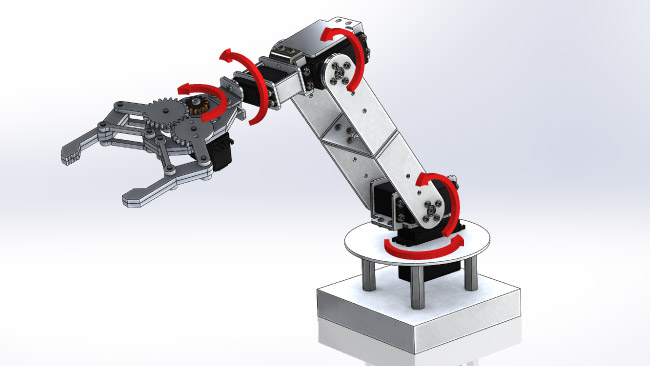
You can make a 5 DOF robot arm with just 5 servo motors and an Arduino board. As for the control you can use simple potentiometers for each motor, or pre-program the movements of the arm. On the other hand, for the construction, the simplest solution is to use a card board. Of course, you can make the construction much better if you are using sheet metal.
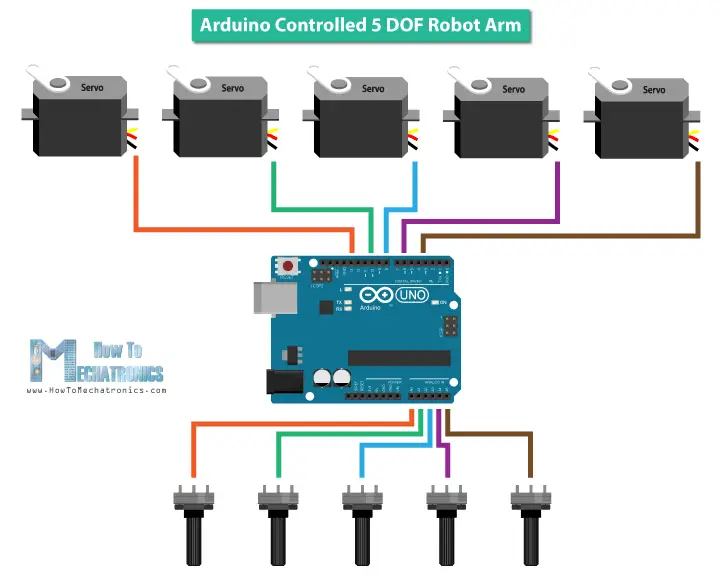
Note that you should use separate power supply for the motors. The Arduino will only send the PWM signal to the motors.
Difficulty: Advanced
Arduino Gesture Control
The idea for this project is to remotely control an Arduino project using hand gestures. Let’s say we want to control the Arduino Robot Car that we mentioned above. So instead of the joystick we will use an MEMS module for the control.
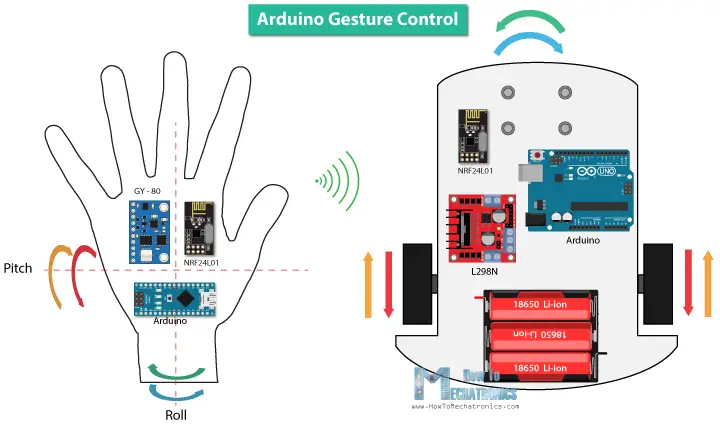
We can use the GY-80 module which features an accelerometer, a gyroscope and a magnetometer. The data we get from these sensors can be used for controlling the steering of the robot car. As for the wireless communication we can use the NRF24L01 transceiver modules.
You can also check my Mechatronics Final Year Project where I used a similar method for controlling a 3D model in Matab Simulink.Difficulty: Advanced

No comments:
Post a Comment